Update
According to David James (Director of engineering, ConfigMgr) this problem is fixed in SCCM 1610 FR2.
Problem
I recently ran into the problem that a Build and Capture Windows 7 Task Sequence failed with Config Manager 1610. It stopped after executing the Setup Windows and Configuration Manager step on the Windows Logon Screen.
I found the cause In the ccmsetup.log. The client installation stopped after encountering the following error
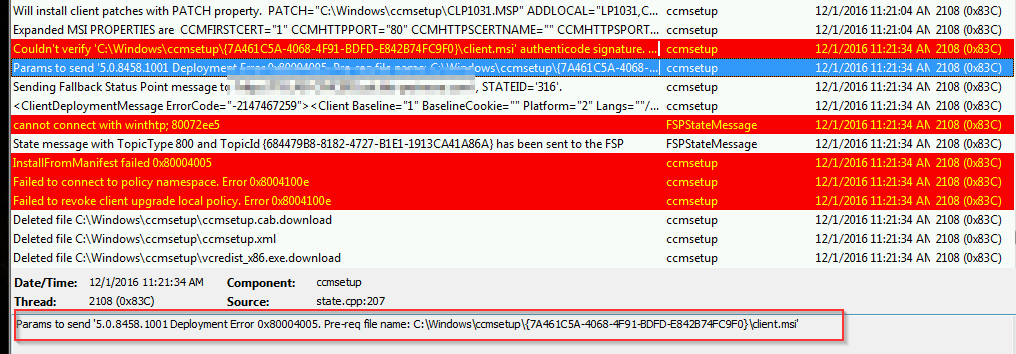
Couldn’t verify ‘C:\Windows\ccmsetup\{7A461C5A-4068-4F91-BDFD-E842B74FC9F0}\client.msi’ authenticode signature. Return code 0x800b010a
When I looked up the digital signature of the client.msi I saw that is was signed by the Microsoft Code Signing PCA 2011 CA which is not part of Root CA certificate store of the Windows 7 SP1 ISO.
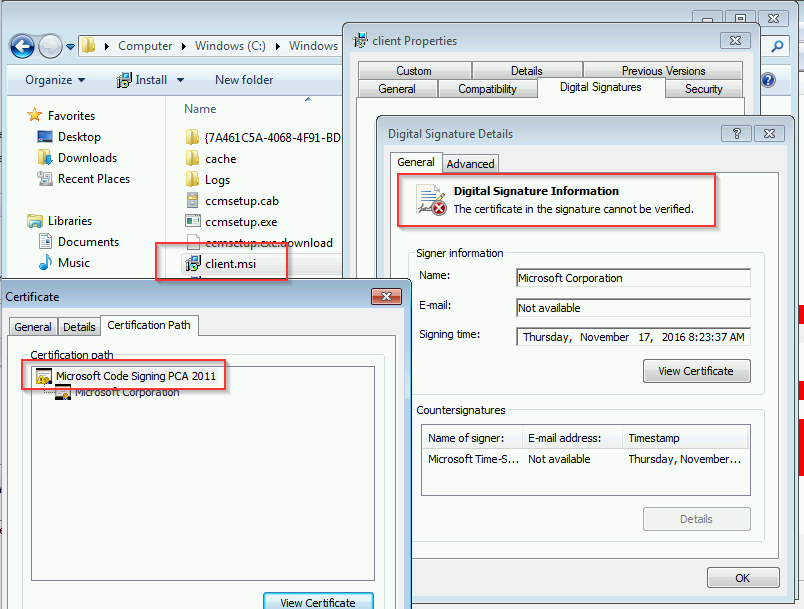
Due to the fact that the Build and Capture Client did not have an internet connection the CA store was not automatically updated and the client installation failed.
Resolution
Option 1
Let your Build and Capture client access the internet.
Option 2
- Download the rootsupd.exe from Microsoft and created a Package in SCCM.
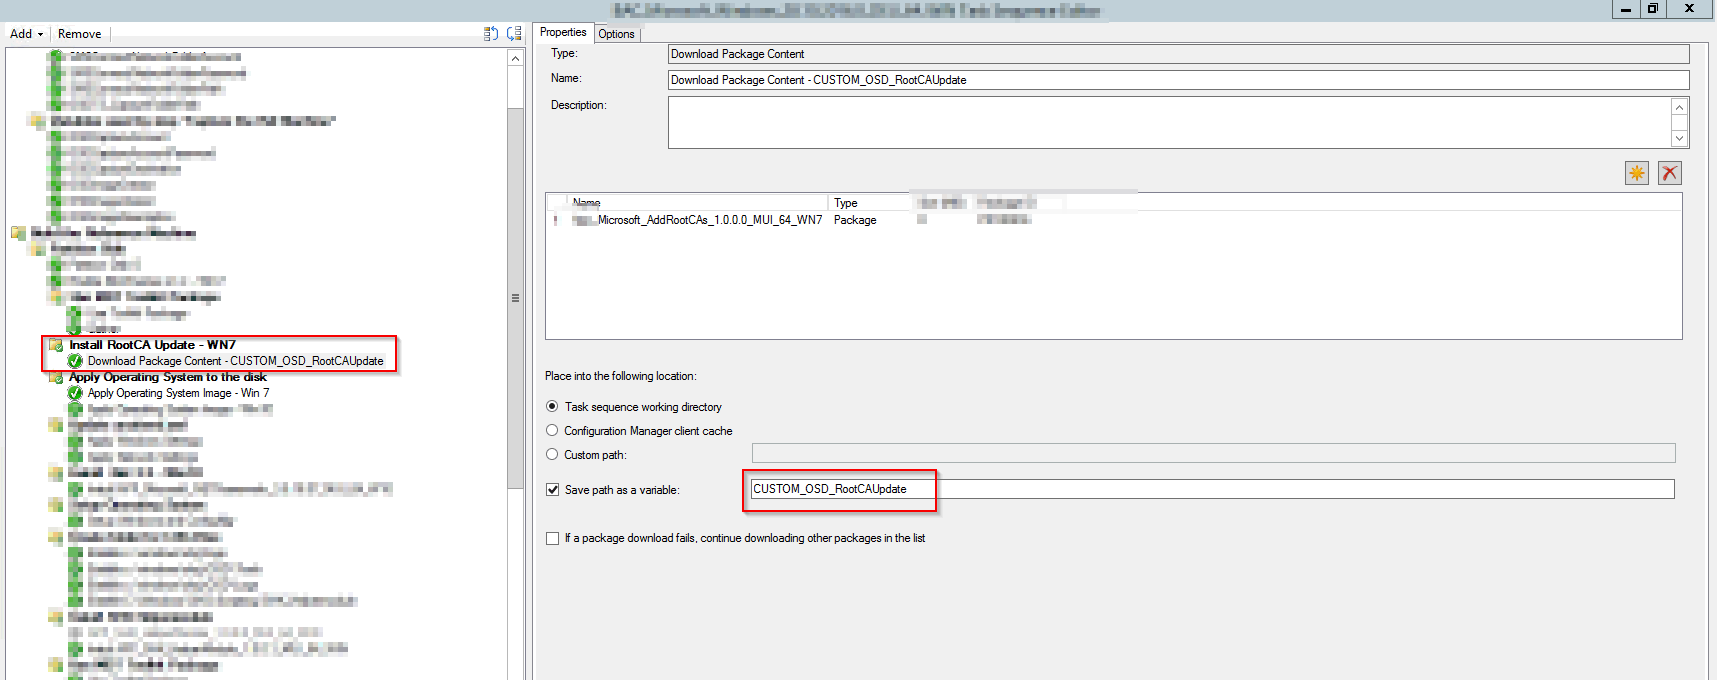
- Create a Download Package Content Task Sequence step right before the Apply Operating system step. And download the content of the created package to the Task sequence working directory and save the location to a Task Sequence Variable.
3. Create an unattended.xml like this:
<?xml version=”1.0″ encoding=”utf-8″?>
<unattend xmlns=”urn:schemas-microsoft-com:unattend”>
<settings pass=”specialize”>
<component name=”Microsoft-Windows-Deployment” processorArchitecture=”amd64″ publicKeyToken=”31bf3856ad364e35″ language=”neutral” versionScope=”nonSxS” xmlns:wcm=”http://schemas.microsoft.com/WMIConfig/2002/State” xmlns:xsi=”http://www.w3.org/2001/XMLSchema-instance”>
<RunSynchronous>
<RunSynchronousCommand wcm:action=”add”>
<Description>RootsUpdates</Description>
<Order>1</Order>
<Path>%CUSTOM_OSD_RootCAUpdate01%\rootsupd.exe</Path>
</RunSynchronousCommand>
</RunSynchronous>
</component>
</settings>
<cpi:offlineImage cpi:source=”catalog:d:/sources/install_windows 7 enterprise.clg” xmlns:cpi=”urn:schemas-microsoft-com:cpi” />
</unattend>

Which executes the rootsupd.exe during the specialize phase of the Windows setup. !Attention you have to add 01 to the variable name!
4. Create a package for the unattended.xml and add it to your Apply Operating system Image step.
